
The title is to the tune of the ever classic song "Cadillac Pimpin'" HAHA! How many different mirror trials have I done in this space? I found one I just loved from IKEA and decided to replace the craziness that was going on.

The frame has a lovely depth. I feel like it could be used as a tray of sorts.

Let's have a look at how it looked before:

I had this grand idea to layer mirrors with different frames. I never got around to framing out that one in the back. It started to feel too cluttered the way it was, so I decided to scrap that plan.
Also, the print that usually hangs there to the right was hung with command strips, and it fell. I've tried to fix it multiple times with no luck, so I took it out for the time being. That sucker hung up there for MONTHS with no issues. One night I was in the shower staring at it and thought "I'm surprised that thing is still hanging with all the moisture in here", and you know what happened minutes later? It fell. Telepathic? I think so.
First step was to remove all the mirrors. I decided to center the new purchase under the light fixture, as opposed to over the sink.

To drill into tile, you need a special drill bit. You can see these are labeled Glass and Tile Bits. Home Depot only had this one pack of 4. It was only about $9, so I bought it, but you may be able to find a pack of 1 or 2 for cheaper.

I measured to the middle of the length of the light and made a mark. I held up the mirror and marked where I wanted the top of it to be. Then I measured how far down the screw needed to be from there. You can mark on ceramic tile with a pencil, and it will wipe right off once you're done.
Several tutorials I read said to place a piece of masking tape over the spot where you're drilling. I used painter's tape. I poked a hole in the middle of the tape with an earring back so I could line it up over the exact spot. Can you see it?

I poked my pencil through the hole, and used it to line up the tape over my drill mark.

I had these 3/16" concrete anchor screws and decided they would work since they would be anchored to the boards that backed the tiles.

I used the 3/16" drill bit. I just placed it over the hole in the tape, and slowly drilled into the tile. I only did it for a couple of seconds before stopping. Then I dabbed a tiny bit of water onto the hole. A few of the tutorials suggested doing this to prevent heat from the friction that may cause the tile to break. I did this a couple of times before removing the tape. The water helped to glob up the dust.

Since I had gotten the hole started, I removed the tape, and stuck a new piece under the hole.

And it collects all the dust! Genius, eh? I just learned this trick from one of my favorite blogs, younghouselove.com.

After the bit went through the tile, it was time to insert the screw. It wouldn't go all the way into the hole. I should have drilled it just a bit wider, but of course I just went ahead with the screw. It chipped off a bit of the tile around the hole, but not a crazy noticeable amount.

I put a little sheet of paper under the tape and dumped the dust onto it so I could dispose of it.
Then I hung the new beauty!

One of the issues with the other mirror was that taller people had to squat down to see in it. With this baby, I folded up a piece of paper and slid it behind the bottom of it to angle it up just a bit. I believe it worked, but I need someone tall to come test it out.

I dig it. I think the round shape mimics the round sink quite nicely.
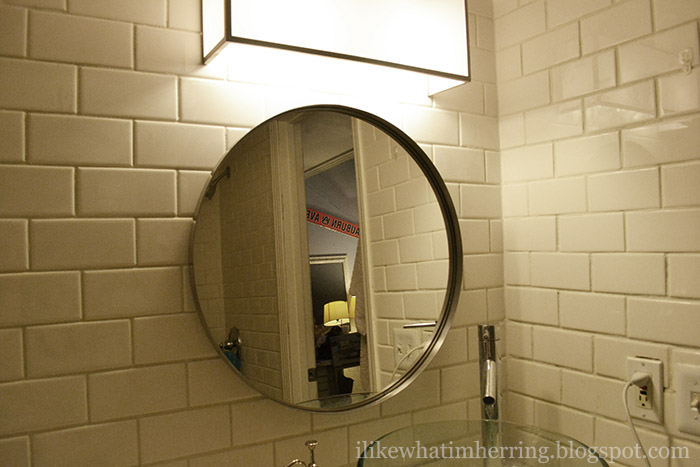
Mmmhmm. Do you like the Auburn Ave sign in the reflection? My ma got that for me a while ago, and when she came up the other day, she randomly stuck it on an existing nail on that wall. I'm not tall enough to get it down..

Random, but I'm still spotting bits of grout on the tile. If you google how to remove grout from tile faces, it will suggest using this crazy acid stuff. Don't do that. I have one of these 5 way awesome scraper tools, and it takes just a few swipes to get the grout off. Then you can wipe the dust off with a rag. Note: this works on my white flat tile, so no guarantee if you have textured tile.

YEAH!

No comments:
Post a Comment